JoySticks
Revision as of 12:29, 8 April 2015 by E.vandenberge (talk | contribs) (→Logitech Attack 3 Controller)
The printable version is no longer supported and may have rendering errors. Please update your browser bookmarks and please use the default browser print function instead.
Red Joystick

Settings
The Red Joystick can be connected to the computer via USB; the device will emulate a serial port. The following COM port settings should be used:
| Baudrate | 115200 |
| Parity | None |
| Data bits | 8 |
| Stop bits | 1 |
| Flow control | None |
| CTS Control | Off |
| DSR Out Control | Off |
| DSR In Control | Off |
| RTS Control | Off |
| Set FIFO Interrupt | Off |
Python
 #!/usr/bin/env python
 from rusocsci import joystick, utils
 import logging, time

 ## Setup Section
 #logging.getLogger().setLevel(logging.DEBUG) # use this for debug info
 #utils.serialList() # get alist of ports with a joystick or buttonbox connected
 j = joystick.Joystick()
 #j = joystick.Joystick(1) # use this to connect to the second joystick
 #j = joystick.Joystick(port="COM1") # use this to connect to a joystick on a specific port

 ## Experiment Section
 for i in range(15):
 print("x: {}".format(j.getX()))
 time.sleep(1)
Logitech Attack 3 Controller

Installation
The Logitech Attack 3 joystick requires a DirectX 7 DLL file to be installed on your computer. If it hasn't been installed yet, please follow the instructions below.
Windows 7 32bit
- Download the dx7vb.dll file.
- Extract the zip and copy the .dll file into the following folder: C:\Windows\System32
- Open the Windows Command Prompt with Administrator rights.
- Register the DLL file by executing the following command:
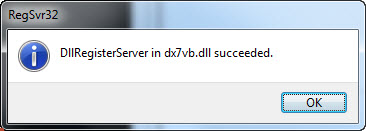
C:\Windows\System32\regsvr32 dx7vb.dll - When done correctly, you should see the following message:

Windows 7 64bit
- Download the dx7vb.dll file.
- Extract the zip and copy the .dll file into the following folder: C:\Windows\SysWow64
- Open the Windows Command Prompt with Administrator rights.
- Register the DLL file by executing the following command:
C:\Windows\SysWow64\regsvr32 dx7vb.dll - When done correctly, you should see the following message: