Difference between revisions of "Surveillance Camera"
(reference to ddns page) |
|||
| Line 1: | Line 1: | ||
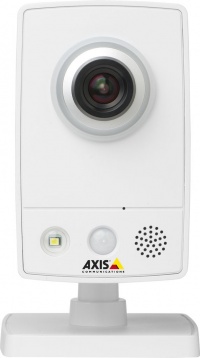
[[File:M1034.jpg|200px|right|Axis M1034-W network camera]] | [[File:M1034.jpg|200px|right|Axis M1034-W network camera]] | ||
| − | If your lab does not have a fixed | + | If your lab does not have a fixed surveillance system, you can borrow the Axis M1034-W network camera to observe a lab and people in it. |
| + | |||
== Setup == | == Setup == | ||
| + | Make a reservation in the [https://instrumentmaker.socsci.ru.nl/Ultimo equipment calendar]. Use the <em>Booking System -> Equipment calendar</em> menu item. | ||
| + | |||
| + | Go to Ronny, borrow the surveillance camera. | ||
| + | |||
Put the camera on a table and aim it at whatever it is that you want to observe. Connect the power adapter to a power outlet. There is no need to connect an ethernet cable. The camera will automatically connect to the university wireless network. Using an ethernet cable will increase the image quality. | Put the camera on a table and aim it at whatever it is that you want to observe. Connect the power adapter to a power outlet. There is no need to connect an ethernet cable. The camera will automatically connect to the university wireless network. Using an ethernet cable will increase the image quality. | ||
== Connect == | == Connect == | ||
| − | + | Use the information on this [https://www.socsci.ru.nl/wilberth/axis/axis.php page] to connect to the camera. | |
| − | |||
| − | |||
| − | |||
| − | |||
| − | |||
| − | |||
| − | |||
| − | |||
== Audio == | == Audio == | ||
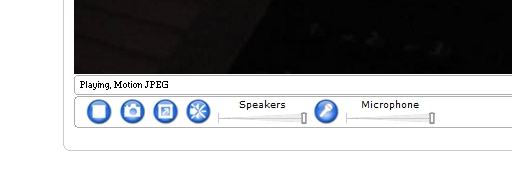
[[File:Babyfoon buttons.png|frame|right|Audio buttons]] | [[File:Babyfoon buttons.png|frame|right|Audio buttons]] | ||
In the web browser, audio buttons are in the bottom left of the ''Live View'' screen. Press the ''Microphone'' button to prevent the participant from hearing you (if a microphone is connected to your computer). Press the ''Speakers'' button to prevent hearing the participant. In the image to the right, the ''Speakers'' button has been pressed to mute the computer speakers. | In the web browser, audio buttons are in the bottom left of the ''Live View'' screen. Press the ''Microphone'' button to prevent the participant from hearing you (if a microphone is connected to your computer). Press the ''Speakers'' button to prevent hearing the participant. In the image to the right, the ''Speakers'' button has been pressed to mute the computer speakers. | ||
Revision as of 14:04, 17 January 2017
If your lab does not have a fixed surveillance system, you can borrow the Axis M1034-W network camera to observe a lab and people in it.
Setup
Make a reservation in the equipment calendar. Use the Booking System -> Equipment calendar menu item.
Go to Ronny, borrow the surveillance camera.
Put the camera on a table and aim it at whatever it is that you want to observe. Connect the power adapter to a power outlet. There is no need to connect an ethernet cable. The camera will automatically connect to the university wireless network. Using an ethernet cable will increase the image quality.
Connect
Use the information on this page to connect to the camera.
Audio
In the web browser, audio buttons are in the bottom left of the Live View screen. Press the Microphone button to prevent the participant from hearing you (if a microphone is connected to your computer). Press the Speakers button to prevent hearing the participant. In the image to the right, the Speakers button has been pressed to mute the computer speakers.

